Sunday, August 29, 2010

Good Books: The Joy of Cooking, 1953


I have a large collection of both new and old cook books, amongst them, two different editions of The Joy of Cooking by Irma S. Rombauer.  One (1936) belonged to my great-grandmother May, and the other (1953) to grandmother, Blanche.  I have two copies of the 1953 edition. Grandma's was falling apart, so when I saw a more pristine copy for $10 at an antique store, I scooped it up.

It  is a bit of an old chestnut, but this truly is a good cook book. It is a faithful, basic guide to all kinds of cooking, and I refer to it often.  The 1953 edition was a complete kitchen manual, advising the homemaker in all aspects of meal-preparation, menu-planning, nutrition, food-preservation, nutrition and the latest kitchen technology.  The Joy of Cooking gives precise and concise instructions on everything one could reasonably expect to want to know how to cook in 1953, and offered hints about how to run a kitchen, especially helpful to the uninitiated 1950's bride. It even tells you how to clean up!
The newest household appliances: the electric mixer,  the blender and the pressure cooker.
Mrs. Rombauer serves up all manner of charming (and timely) advice:
'Serve hot food hot from hot dishes. Serve cold food chilled from chilled dishes.  Keep calm even if your hair striggles and you drip unattractively. Brush up before serving. Your appearance and the appearance of the food are important, but eating in a quiet atmosphere is even more important to the family's morale and digestion.
A meal represents effort and money.  It is worthy of a dignified hour.'

This book emphasizes the true importance of the kitchen as the centre of the home. Some of the instructions, such as those for canning, are now outdated compared to today's standards, but this book also contains information not found anywhere else.
Canning instructions illustrate how to use different types of canning jars and lids.
I love the illustrations in this edition.
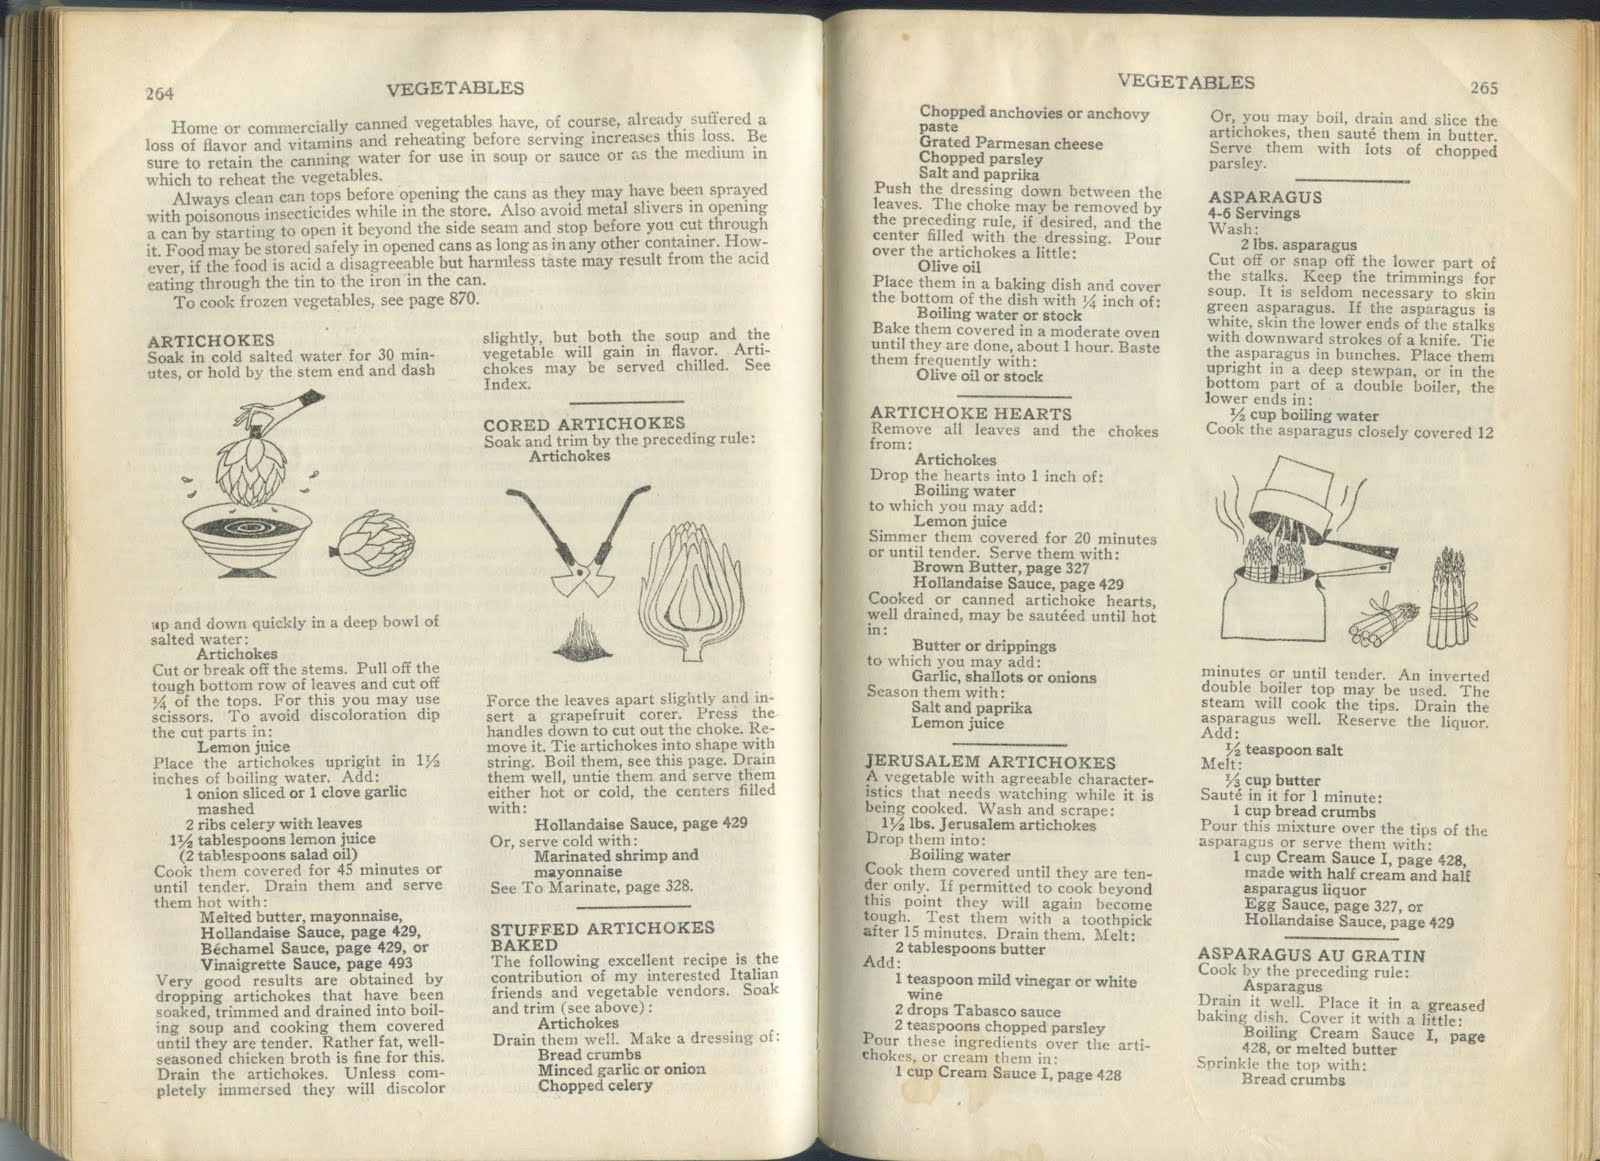
How to prepare artichokes and steam asparagus.


Sunday, August 22, 2010

Almond Shortbread Raspberry Jam Sandwiches


When I was in university, I worked in an English tea room, and I had to make hundreds of tarts, cookies, and scones every week.  It was then that I became truly at ease with baking and making pastry.  We used to make several pounds of butter pastry at once (by hand, without an electric mixer!).  I learned lots of tricks and was introduced to many handy tools working in the tea room kitchen.

These cookies are a hybrid between Empire (or Belgian) cookies and shortbread. At the tea room, we always iced the Empire cookies with almond icing, and they had raspberry jam in the middle. When I make these at Christmastime, I cut them into star shapes or trees, or hearts for Valentine's day.  You can use any kind of jam, but I like raspberry best.

Shortbread is one of the simplest types of cookies to make.  The basic recipe of butter, sugar, salt and flour can be adapted with any flavour simply by adding various extracts, fruit, nuts, sugar or chocolate.

1/2 lb of soft butter (1 cup)
1/2 cup of white sugar
1 tsp vanilla extract
1 tsp + almond extract (I add extra sometimes)
1/2 cup ground almonds
1 tsp sea salt or kosher salt
2 cups flour

Cream butter and sugar together.  Add the remaining ingredients in order listed.  Mix together until dough is smooth.  This time, I used an electric mixer, but it is easy to do by hand. In fact,  the dough is easier to handle if you mix it by hand. Form dough into a ball, flatten it into a disc, and wrap in wax paper. Chill 1 hour.

Preheat oven to 325 degrees.

Roll out dough to 1/4 inch thickness.  Use flour as needed to prevent dough sticking.  I like to roll my pastry and dough directly on the counter.  This gives you lots of space to manoeuver.  My rolling pin belonged to my great-grandmother.  It is a great pin; it's heavy hardwood, and moves really smoothly. My favourite part of it is the scorch mark on one end where it was left too close to the woodstove.

Cut into desired shapes, and place on cookie sheet.  Chill in the freezer until cookies are stiff.  This will help them keep their shape while baking.  Bake cookies 15-20 minutes, or until edges are just golden. Cool on rack.

When cool, spread a generous layer of raspberry jam on the bottom of one cookie and top with a second cookie.  Gently press together. If you let them sit for a bit, the jam will set a little, and they will be less messy.

Enjoy with tea.

Monday, August 16, 2010

A Peachy Day and a Spicy Evening


Canned Peaches:  Halves and Slices

 4  3-quart baskets of Red Haven Peaches
 +
 4 hours of peeling, pitting, slicing, cooking, jarring and processing
 = 
 7 jars of peach halves and 4 jars of peach slices

Method:

I used a combination of the open kettle method and the 'recommended' method.

The Open Kettle Method is an old fashioned way of canning, and the method my grandmother would have used.  You cook the fruit until it is entirely cooked, and then put it into sterile jars and seal with sterile lids and bands, with no further processing.  
Safe food handling guidelines no longer consider this method safe.  For peaches, it is recommended that the peaches be canned either raw pack (putting uncooked fruit in jars) or hot pack (partially cooked fruit), and then processed for 20 to 30 minutes to complete cooking the fruit and sealing the jars.  I find this method troublesome because I find the fruit always floats (which results in air discoloring the fruit). Always searching for perfection, I have tried cooking the fruit through, and then processing for ten minutes to ensure proper sealing and safety. This still needs some experimentation, but the results this time were pretty good.  And delicious.

I cooked the peach halves and slices separately in the honey syrup left over from canning the apricots, cooking the fruit in boiling syrup until it is quite soft.

Then I packed the jars very full with the peaches, trying to fit as much fruit in a possible.  This is much easier with the slices than the halves. Cover the fruit with boiling syrup.  Use a kitchen knife to release bubbles trapped under the fruit, and top up the jars with more syrup if necessary. Seal jars. Process 10 minutes in boiling water bath.

Enjoy these peaches in wintertime in yogurt or over ice cream, or all by themselves.


Start by scalding peaches to remove skins.
Peaches awaiting peeling.

 To  prevent discoloration,
cover peaches in water with a bit of lemon juice.


Cooking the peaches in syrup, one jar full at a time.
Filling the packed jars with syrup, and sealing.

Peach halves in the canner, after processing.
Voila!
Et voila!


Peppers galore.

Pickled Peppers

The hot peppers at the farm are just starting, and already there are nearly too many to eat fresh or sell.  So I decided to pickle some.  I used a recipe by David Lebovitz. You can pickle any kind of fresh, thick-fleshed pepper, or mix several varieties.  I used jalapenos. 

If you are brave, you can eat the pickled peppers whole, or use them in cooking like you would fresh hot peppers. 

Fait accompli!

Sunday, August 15, 2010

Canned Apricots


Lovely apricots from Hamilton Farmer's Market


I have spent time each summer since childhood canning fruit, and making pickles and jam.  When I was young I was my mother's assistant in this task, and later we worked together.  Now I do much on my own, but Mum and I still work together on labour intensive tasks which involve lots of peeling and slicing, like canning peaches.

When I canned apricots in the past,  I removed the skins, and they were cooked, the delicate fruit turned to mush.  This time I left the skins on, which is not only easier, but appealing, since the skin is the most beautiful part of the apricot.

This time I decided to use a medium honey syrup, using half honey and half sugar. Medium syrup is about 2 parts water to 1 part sugar, so 4 cups water, 1 cup honey, and 1 cup white granulated sugar.  The syrup smells and tastes wonderful.

Note: many of the methods I use are the same as those my grandmother used.  Many of them follow the open kettle method, which is now not recommended to use by safe food handling guides.  I use these methods because they have never failed me, and I like the results from them.  It is, however, extremely important to be scrupulously clean when preserving food.  All tools and utensils should be clean and jars and lids should be sterilized carefully. 

Method:
Wash apricots. Cut fruit in half lengthwise and remove pits.  Measure fruit to determine how much syrup to make. Pint jars will require 1/2 cup to 1 cup of syrup.
Make syrup: in a large saucepan, bring honey, sugar and water to a rolling boil. Stir to dissolve sugar
Add apricots.  Return syrup to a boil. Stir very gently, as to not damage the fruit. Simmer until apricots are soft, but not falling apart.
Gently ladle apricots into hot, sterilized jars, and cover with boiling syrup.  Seal jars with snap lids and rings.  Let cool.


Apricots cooking in the syrup.


The finished product, with lots of left-over syrup.  I will use this up when I can peaches this week.