Tuesday, February 7, 2012

New Experiments


My life has undergone quite a sea change since I last wrote.  First, I left reasonably stable employment as a studio technician and teacher to go back to school.  Second, and slightly more dramatically, after a mad summer of dyeing, knitting, canning, pickling, gardening, farming and craft-fairing, I left my friends, family and ninety-nine percent of my possessions behind and moved to London, England, to begin a master's degree in textiles at Chelsea College of Art and Design.  This venture had been contemplated for some long time, and pondered with my typical amount of vacillation, hesitation and constant what-ifs. Now here, I sometimes question how this could be my life - living in London - but I consider myself very fortunate to be given the opportunity to devote this kind of focused time to my studio practice. 


I have always been seduced and bewitched by colour, how it is made and its significance to human culture and history. The origin of colour and how it is used is endlessly fascinating to me.  So while the focus of my MA project is actualy natural dye printing and unlocking the secrets to its processes, at the heart of my research is colour. After many years of experimenting with using natural dyes for immersion dyeing, I had only been trying to find the time to try printing with them.  As a printer I love working with dyes because of their luminosity and transparency - they work on the cloth like watercolour - but recently I have become increasingly concerned about the adverse health and environmental effects of working with synthetic chemical dyes over many years.  Further, the more I work with natural dyes, the more I find myself favouring their colour palette. 

Over the next six months I will be sharing my MA research here and I hope this documentation of my process will serve to show that natural dyes can be used in ways very similar to those used with fibre-reactive or acid dyes for textile printing.  One of the lofty aims of my project is to foster the use of natural dyes as an alternative to conventional dyes in craft production.

I shall explore varied ways of applying the colour to the cloth, via different print pastes, pre-treatments, mordants and assistants, as well as attempting to discover all the possible permutations of colour by adding colour-shifting acids, alkalis and mordants to the dyes.  In the meantime, I am doing lots of reading into the rich history of our relationship with plants, particularly those used for dye, and sharing some of the cultural history of those dyestuffs here.  I am also researching how natural dyes were used in industrial production prior to the discovery of synthetic colour in the mid 19th century, and how the move to synthetic dyes changed the world - this is not a melodramatic statement - this shift was at the very crux of the Industrial Revolution. 

colour swatches in progress

To begin, I am testing the variety of colours that can be obtained from the various commercial extracts easily available from several suppliers.  I have begun by working with those from Pure Tinctoria and the partnership between Maiwa & Couleurs des Plantes.  Extracts are powdered dyestuffs that are soluble in water - the colour has already been extracted from the plant source.  To make a print paste, I add thickener to my solution of water and extract.  I will discuss the exact process in future dispatches.  I intend to use my print pastes for screen printing, but at the moment, I am only sampling small swatches of colour, so I am applying the colour by stencil instead.  I have chosen to work on linen, hemp and wool fabrics, as these are the historical fibres of Europe, and the dyes should react differently to cellulose and protein fibres.

applying the extracts to both mordanted and unmordanted wool

Above are some colour samples before steaming - these colours will be very much brighter and lighter once steamed and washed.  Shown below are the very beginnings of my colour tests, recently steam-set and washed, to see if the colour would hold, and it did.  In a momentary lapse of planning, I did not photograph these samples before steaming, only after steaming, before and after washing.  Before steaming, the colours are more subdued and less vibrant than you see them here.  The chemical reaction that releases the colourants and bonds them to the fibre does not occur until steaming, as heat is required for the reaction to happen.  Happily upon washing, while the print paste, which has a slightly yellowish cast, washes away, leaving behind beautiful, brilliant colour.

after steaming, prior to washing

Now that I am deep into my research, I see everything through a the lens of colour, plants and history - I am truly a nerd about it!  I promise to also share selected adventures of lovely things in London, like my frequent pilgrimages to the V&A, weekly walks along the Regent's Canal and other discoveries while I'm abroad.   I hope to hear from kindred spirits as I go along, so please do comment and/or contact me.

 after steaming and washing: vibrant hues from annatto, madder and coreopsis
 

Wednesday, May 25, 2011

Obsession: Rhubarb


My Obsession for the Month of May is Rhubarb.  It is such a beautiful vegetable.  Perhaps one cannot really call it a fruit, but it is the first true fruit of spring.  I currently have about five plants going, which seems like quite a few, since rhubarb plants are large, but if you are canning or preserving the rhubarb, it is easy to dispatch with what five plants can produce. Putting down, or putting up the rhubarb is the task I address today.


The simplest, and very fast method for preserving rhubarb is to wash, chop, measure, and then freeze the stalks.  Simply throw them in bags in the freezer.  I always measure it first, and then label the bag with the amount inside. This simplifies things later when you go to use it.


First, both with my beautiful forced rhubarb, and my regular rhubarb crop, I made rhubarb compote, using the recipe from Alice Water's Chez Panisse Fruit:

1 lb of rhubarb
zest of 1 orange (valencia or other juice orange)
1/2 cup white sugar
3 tablespoons freshly squeezed orange juice

Combine ingredients together in an ungreased baking dish.  Bake covered for 25 minutes at 350 degrees.  Remove cover and bake for another 5-10 minutes, or until rhubarb is soft, but still in pieces.  


This compote is lovely on ice cream, creme fraiche or yogurt, or eaten on its own.  It would also be nice with meat.  I find it best if you leave it for several days before eating so that the flavours can really meld.  

The orange zest beautifully tempers the tartness of the rhubarb.  The first batch of compote that I made with the forced rhubarb was eaten fairly immediately - 1 and 3/4 jars full. There they are, in the refrigerator beside last year's dill pickles. It is a beautiful bright pink colour. 


For the second batch, I multiplied the recipe six times to make enough to preserve in jars.  I harvested six pounds of rhubarb! I applied the same method as above, but after placing the compote in jars, I processed the compote for 15 minutes in a boiling water bath.  This ensured that my jars would properly seal.  Six pounds of rhubarb yielded 4 quart jars.


Notice that the compote made with this rhubarb is different in colour, made up of of the red and green parts of the rhubarb stalk.  To achieve a pink colour, you can exclude the green parts of the stalk, using only the red, but I do not like to waste any part of a good stalk of rhubarb.  I like the odd green colour of the the compote.


 Second, I made rhubarb jam, which is something I have never tried.  I always make strawberry-rhubarb jam, but this year I was inspired by my newest culinary obsession,  The Blue Chair Jam Cookbook, a birthday gift from my dear mother.  The book's author, and proprietor of the Blue Chair Jam Company, Rachel Saunders, praises the purity of flavour of plain rhubarb jam:

"One thing that always mystifies me is the difficulty of finding rhubarb cooked on its own; we always seem to succumb to the temptation to combine it with something else.  Yet rhubarb's unique flavour and texture set it apart from other early summer ingredients, and a really perfect rhubarb jam is hard to beat."

The recipe contains only rhubarb, sugar and lemon juice. Lemon juice brings out the flavour of the fruit.  It is an ingredient in all of Rachel Saunders Blue Chair jams.  The jam was everything promised in this beautiful cookbook - intense fruit flavour, tart and wonderful.  I ate it for breakfast this morning.

Recently, while reacquainting myself with The Victorian Kitchen Garden,  I learned not only of the technique of growing rhubarb in a forcing pot, as I did this year, but also of raising it in a heated, darkened forcing shed to bring on the growth of rhubarb in the winter.  In the north of England, they once had whole buildings devoted to this purpose.  Rhubarb forcing factories!  Now that I've seen that, I wondered if it is possible do so in one's basement. My suspicion was confirmed by Dick Raymond of Garden Ways Joy of Gardening.  This is possible. More on this later!

Perhaps we are tired of hearing all about rhubarb, but this will not be the last you hear of it from me.  I have yet to extoll its virtues as a useful natural dye plant and mordant!

Wednesday, May 18, 2011

Accidental Collections: Needles and Threads


Another collection of haberdashery related objects I inherited is this collection of assorted needles, spools of thread and empty spools. These needles are as they were left by my grandmother,  who kept them all in an old cheese cracker tin.  I am certain that some of the needle packets and the fancier threads were rescued from the sewing rooms of the two great houses she worked in later in her life.  My grandmother was a strictly utilitarian seamstress. 


The box of darning needles is an old cardboard package of hypodermic needles, that likely belonged to one of my great-grandmothers,  who was a diabetic.  In the days before disposable needles, she sterilized and reused the needles she used to inject herself with insulin. 


Many of these empty spools are from thread companies and stores long gone by, such as Belding and Eaton's - the spool above must be from when Eaton's still had a haberdashery department. There are also spools from Zeller's, Corticelli, Peerless, Trimtex and J & P Coats (the only company that I believe is still in operation).  If you look carefully at the labels you will notice that some of the spools say  Made in Canada. I love some of the labels - Dewhurst's Sylko "Three Shells" Machine Twist.  And yes, that is Butler's unwaxed dental floss, on a wooden spool!


There is an array of different types of thread:  darning silk, silk-like nylons, mercerized cotton, and the dreaded 1950s invention, polyester.  Below is an array of coloured threads in varying weights for machine sewing, darning silk, button-hole twist, rayon thread, embroidery and crochet cotton and silk.

I use these threads quite sparingly.  I keep them in glass jars in my studio organised according to colour because I just like to look at them.  The thread seems so special when it is wound around a wooden spool. 


Tuesday, May 10, 2011

Weekend Whirlwind


It was a beautiful weekend full of activity.  Saturday afternoon, Kate, Erick and I attended some Doors Open Hamilton locations - Dundurn National Historic Site - specifically the William Reid Cottage, and the Kitchen Garden, as well as the Mohawk Trail School House (but I'll save that for later!).  We would have liked to go inside the Castle but the line up extended out the door and around the corner.  We were impatient and did not want to queue. 

Sir Allan MacNab's very own cock-fighting pit. 

Dundurn, the home of Sir Allan Napier MacNab (one of Canada's first premiers), was one of my favourite historic sites to visit as a child.  Our family vacations were always educational, comprised of trips to museums, historic homes, forts, archaeological sites, natural wonders and pioneer villages, but Dundurn Castle was my hometown historical house and I am so familiar with it that I could probably give a guided tour of it myself.  My favourite part of the house as a child was upstairs with all its finery, but I am now more interested in the below stairs part of the house, with its kitchen, laundry, scullery and food stores. 

A dormant, not yet in bloom, hedge of lavender.

In recent years, there has been an exciting addition to Dundurn as they have begun to restore the Kitchen Garden, and there are plans to begin restoration on the home of the head gardener, William Reid.  The garden is a wonderful place to visit at almost any time of year, because it is always in continuous state of growth and flux. 

The garden pump.

They have been carefully recreating the garden based on historical research, and populating it with heirloom and historical plants.  Last fall when I visited the garden, I was surprised to discover that the Victorians were growing such diverse foods such as ground cherry and tomatillo. Exciting things were happening this spring.  The Victorians preferred to eat their asparagus white, and would blanch them under specially-woven baskets stuffed with straw. 


The Victorians did as much as they could to extend the growing season for fresh produce, employing cold frames and greenhouses.  They built hothouses where they grew cucumbers, peaches and pineapples indoors.  Many years ago, I remember watching a series on TVOntario, The Victorian Kitchen Garden, that documented the recreation of an English Victorian estate garden, and the astounding measures that gardeners undertook to put food on the tables of the great houses.  It was an era when a gardener could be dismissed for sending an unripe melon to the dining room!


 I am increasingly interested in historic practices of housekeeping and gardening and how these activities can contrast with contemporary approaches.  There is so much to be learned from how things were done, with such ingenuity, in days long ago. I will be posting further here, and on the Beehive, about the Kitchen Garden, and the activities below stairs at Dundurn.


From Doors Open to our very own gardening venture, up at the Buttrum farm.  It was Kate and Erick's first time up to the farm, and they plunged right in.  We worked hard for a few hours, finishing Gabby and Courtney's work planting strawberries, and then planting 150 rhubarb plants. Rhubarb and strawberries are both perennials, and will take at least a season to get established before we can begin harvesting.  Strawberry rhubarb pie and jam will have to wait a while.

Planting the tiny strawberry plants involves making a hole in the earth with your hand, tucking in the plant and gently but firmly, closing in the soil around the strawberry's roots.  This was made easy, as the soil at the Buttrum's farm is sandy, loamy and very soft, perfect for growing vegetables!


I took a few rhubarb roots home with me, where I will add them to my backyard patch.  Rhubarb roots are bizarre looking, but a very useful part of the plant.  Rhubarb leaves and roots are rich in oxalic acid, which is poisonous, but also a good mordant and dye for natural dyeing! You can also use oxalic acid to make your own cleaning solutions...


We spent Sunday at the farm planting onion sets for bunching onions, and I also finally harvested my forced rhubarb and made a lovely stewed rhubarb for Mother's day dessert, which I will post about tomorrow!

Thursday, May 5, 2011

Accidental Collections: Belt Buckles and Other Closures


 Another collection inherited from Grandma Blanche:  an assortment of celluloid, metal, mother-of-pearl and plastic belt buckles.  These were saved from garments long since gone.  Grandma kept these in wooden box. I would say these are from a time period ranging from the 1920s to the 1970s.  One of these, the very tarnished, possibly silver-plated, rectangular buckle in the centre is a man's belt buckle monogrammed with the letter 'E'.  It must have belonged to my grandfather, Edgar, known as Ed. 

I do not have an array of stories or eloquent things to say about these objects; I simply wanted to share these photographs of these beautiful things.


The colours of these old celluloid buckles are lovely - so rich and fruity.  There is a depth and translucency to the colours that you do not  find in today's plastics. The red prism shaped piece on the bottom left has a hook on the back that would fit into the belt holes.


The large circular blue piece on the top right is actually a button, but I liked this composition of blues. On the top left is a sort of bar closure, perhaps for a sweater or jacket.


Two very elegant leafy buckles.  The bottom buckle is brass.  The top buckle is quite exquisite - it is brass, and carved wood.


This black and white floral celluloid buckle, of perhaps poppies, was always one of my very favourite buckles.  It hooks together, though the mechanism is not visible in the photograph.  It must have come from the belt of a dress or coat; there is also a set of matching buttons.

Tuesday, May 3, 2011

Accidental Collections: Knitting Needles


After last night's election, I feel the need to focus on light, pragmatic things.  Vacuuming.  Cleaning the bathroom.  Making a pot of soup.  So today, a new feature post for Domestic Scientist:  Accidental Collections.

Shuttles and yarn holders.

I have collections of many things, mostly domestic objects.  While I might easily be accused of being a pack rat, I defend myself on that charge in that I have inherited most of these things from my Grandma Blanche. As I've mentioned before, she kept everything.  She worked as a domestic servant in two  households for elderly people, seeing these people through the end of their lives.  When the estates were being dispersed, the children of my grandmother's employers saw little value in the wares of the kitchen or the sewing room, so my grandmother was permitted to take whatever she liked.  I believe that this is the primary source of her stash of especially sewing notions and haberdashery.

Multiple, mostly unopened packages of double-pointed knitting pins.  I love the graphic paper packaging.

There is such worth in these practical, useful objects.  Many of these items are so well made that they have truly stood the test of time.  They now represent to me a new era where we are slowly beginning to understand again the value of ordinary things as we revisit once again working with our hands. Think of these tools and how they relate to the work we do, and the work that was done with them.

Blanche's knitting needles.

Today I share some images of knitting needles and related tools.  I adore the colours and shapes of these cellulose knitting needles so much, that I have added to my collection. Who will love these objects if not me?

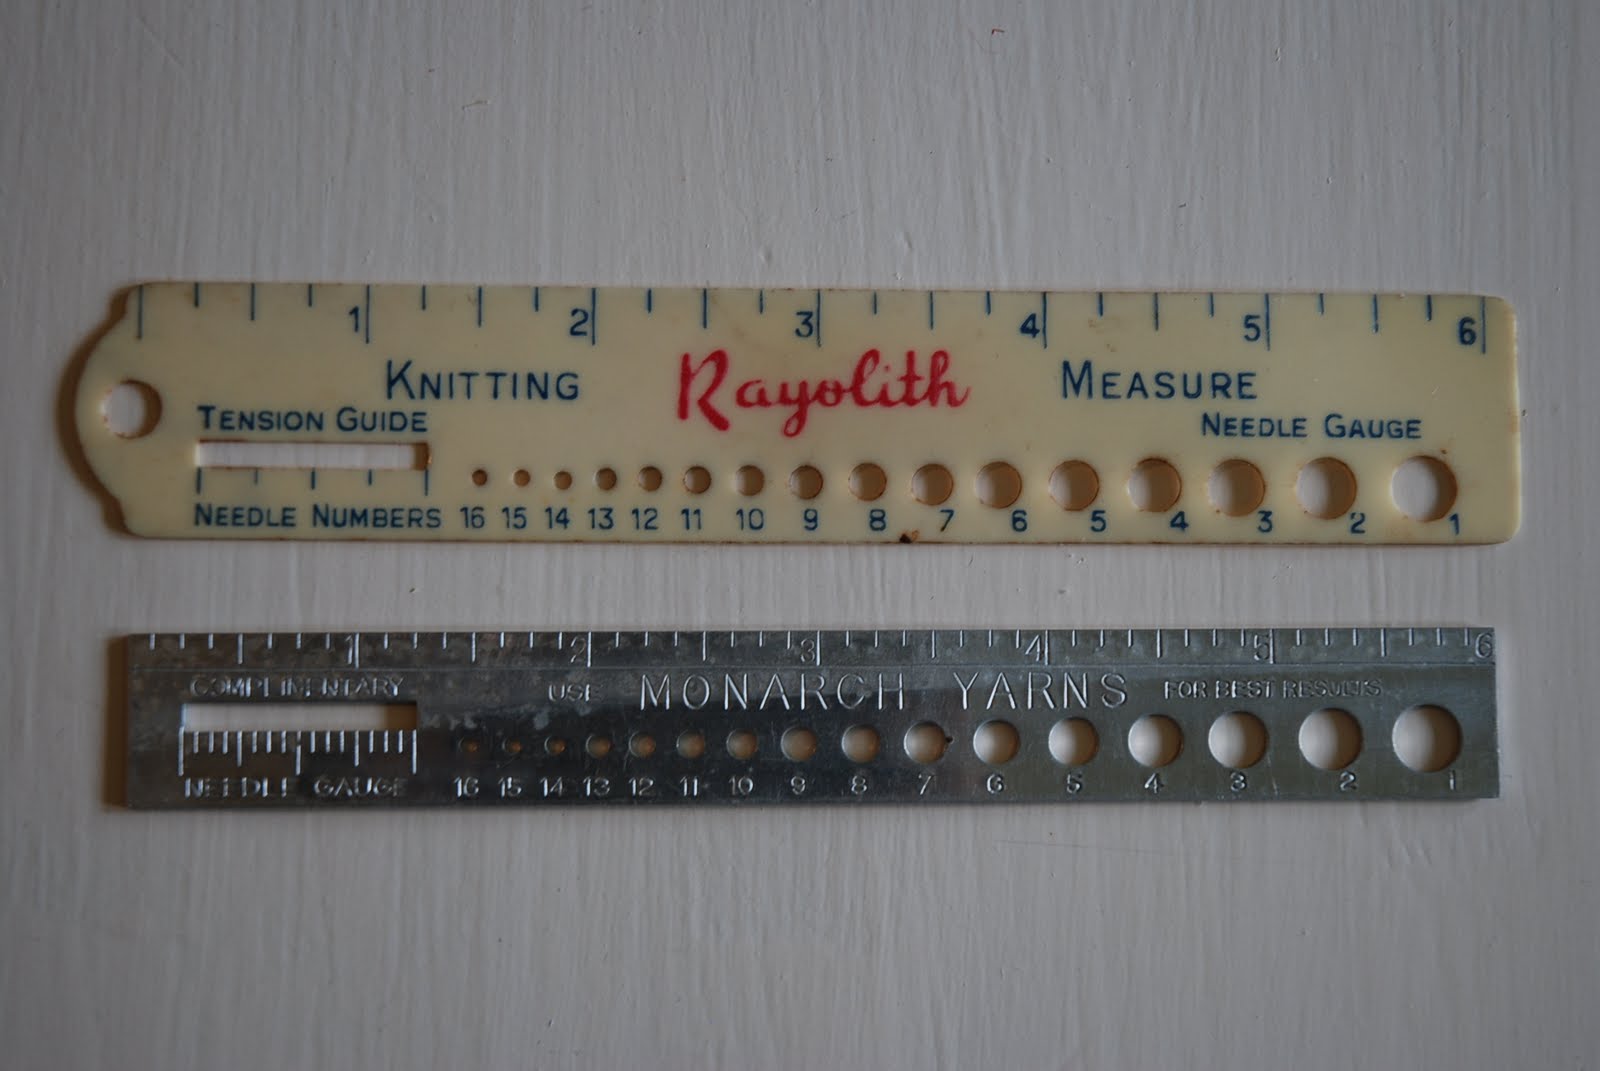
Needle gauges.

When I was little I used love to take all these objects out of their boxes and  look at them - beautiful colours, shapes and textures.  I think I can trace my love of textiles, colour and vintage objects back to these treasures.

I found this collection of knitting needles at a thrift shop.  If I hadn't rescued them, they might have languished there forever, gathering dust.  Better that they come home with me, where they are appreciated!